Recording Drums for Your Home Cinema
Creating a captivating home cinema experience is about more than just the right screen and seating; it’s about achieving that perfect sound. If you’re looking to elevate your audio landscape, recording drums in your home cinema setup can create an immersive atmosphere that transports you right into the action. Whether you’re producing film scores, mixing soundtracks, or simply adding live elements to your recordings, the right approach to capturing drums will significantly enhance your cinematic experience.
Choosing the Right Space
Your home cinema room can be an excellent space for recording drums; however, acoustics are crucial. To achieve the best sound, consider the following:
- Soundproofing: Ensure your cinema room is adequately soundproofed. This will prevent outside noise from seeping in and help control sound reflections within the space.
- Room Size: A larger room can help in distributing sound more evenly, while a smaller room might produce a more intimate feel. Experiment with different setups to find what suits your project best.
- Acoustic Treatment: Use acoustic panels or bass traps to minimize unwanted reverberation and create a clean audio environment for your drum recordings.
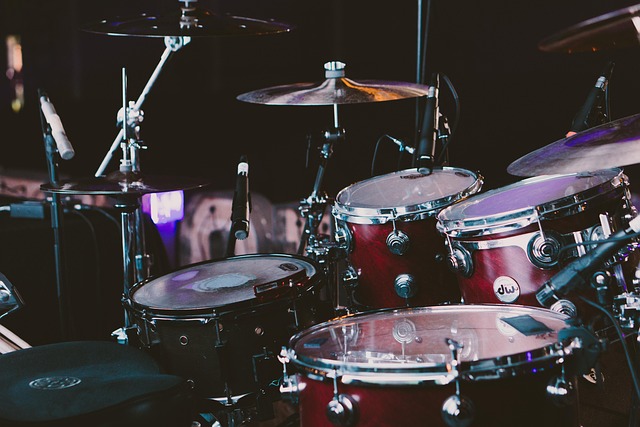
Microphone Selection and Placement
The choice of microphones and their placement can make a world of difference in capturing the vibrancy of drums. Here are some tips to maximize your sound quality:
- Microphone Types: Use dynamic microphones for close-mic’ing the snare and kick drum (e.g., Shure SM57 for snare, Shure Beta 52 for kick). Condenser mics work well for overheads to capture the cymbals and room ambiance.
- Positioning: Experiment with mic placements to find the sweet spot. Typically, overhead mics should be positioned above the drum kit, while kick and snare mics should be as close to the source as possible without causing distortion.
Record Settings and Techniques
Once your microphones are in place, it’s time to consider your recording settings:
- Sample Rate and Bit Depth: Opt for a sample rate of 48kHz or higher, with a bit depth of 24-bit, to ensure you capture the full dynamic range of the drums.
- Monitor Levels: Keep an eye on your levels during the recording process. Aim for a strong signal without clipping to maintain the integrity of your audio.
- Performance Considerations: Ensure that the drummer is well-rehearsed and feels comfortable in the space to facilitate a natural performance that translates well into audio.
Integrating Video with Your Audio
Recording drums is not only about the sound; it’s about marrying that audio with visual elements, especially when crafting content for a home cinema. Here are some tips for integrating video:
- Syncing Audio and Video: Make sure to clap at the beginning of your takes; this provides a visual cue that helps sync audio and video tracks seamlessly.
- Camera Angle: Position cameras to capture both the drummer and the kit dynamically. Mixing various angles can enhance the visual impact of your performance.
- Lighting: Pay attention to lighting in your cinema room. Effective lighting can create atmosphere and excitement, making the visual experience as vibrant as the audio.
Final Touches
Post-production is where the magic happens. Enhance your drum recordings by:
- Mixing: Balance each drum element (kick, snare, cymbals) in the mix to prevent any one part from overpowering the others.
- Adding Effects: Use reverb and compression carefully to give depth and character to the drum sounds, making them more cinematic.
- Video Editing: When editing your video, ensure transitions between shots are smooth, correlating to the rhythm of the music to maintain viewer engagement.
By focusing on these crucial audio and video tips, you can achieve dynamic drum recordings that not only enrich your home cinema experience but also resonate with your audience. So grab those sticks, set up your mics, and let the cinematic journey begin!