In the age of high‑definition streaming and ultra‑wide‑band audio, the term “recording” has expanded beyond simple capture. Whether you’re logging a movie night, archiving a live concert, or documenting a home‑grown film, the way you record inside a cinema‑style room dramatically shapes the final experience. This article explores practical, science‑based techniques that turn a generic playback space into a professional‑grade venue for both audio and video recording.
Understanding the Core Elements of a Home Cinema Record
A successful recording hinges on three intertwined elements: acoustics, lighting, and signal flow. Each of these components must be carefully engineered to preserve fidelity and authenticity. Acoustics control the way sound waves interact within the room; lighting ensures that the visual feed is sharp, correctly exposed, and color‑accurate; signal flow governs how audio and video signals travel from source to storage, preventing degradation.
Acoustic Foundations for Audio Recording
Before placing any microphone, assess the room’s reverberation time (RT60). A typical cinema‑style room should aim for an RT60 of 0.4 to 0.6 seconds in the mid‑frequency range to avoid muddy sounds while preserving natural ambience. Use sound‑absorbing panels, bass traps, and diffusers to balance reflections.
“A controlled acoustic environment turns raw recordings into polished, immersive audio.” – Acoustic Engineer, SoundLab
Microphone Placement Strategies
Choosing the right microphone and positioning it properly are critical steps in recording. The most common setups for a home cinema include the following:
- Shotgun Microphone – Ideal for isolated dialogue; position 6–12 inches from the sound source, angled to avoid background noise.
- Stereo Pair (XY or ORTF) – Excellent for capturing ambient soundscapes; place the pair 18–24 inches apart, 8–10 inches above the listening area.
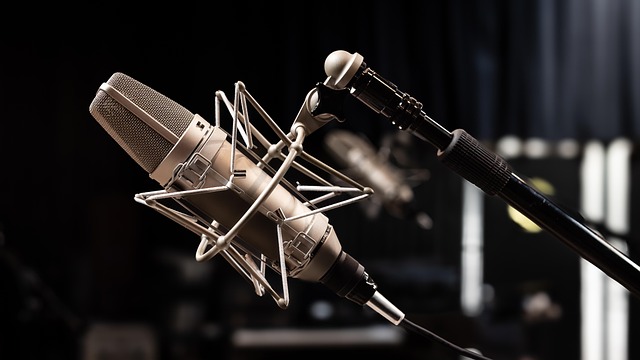
- Large‑Dish Condenser – Offers a full, cinematic sound; mount at 1–2 meters above the audience, angled toward the center of the room.
Always record a reference track by speaking or playing a test tone to confirm levels and balance before starting the main session.
Signal Integrity: From Microphone to Storage
Maintaining clean, high‑resolution signals is essential. Use balanced XLR cables for audio to reduce electromagnetic interference. Connect the microphone to a high‑quality preamp, then route the signal to a digital audio workstation (DAW) via an audio interface that supports at least 24‑bit/96‑kHz recording. Avoid unnecessary analog conversions; if you must, use a reliable analog‑to‑digital converter (ADC) with low noise floor and high dynamic range.
Lighting Considerations for Video Capture
In a cinema‑style room, natural light is usually limited, so artificial lighting becomes the cornerstone of video recording. Follow these guidelines to achieve cinematic quality:
- Key Light – Position at a 45‑degree angle to the subject, providing the main illumination. Use a softbox or diffusion panel to reduce harsh shadows.
- Fill Light – Place opposite the key light at a lower intensity to soften shadows without eliminating depth.
- Back Light (Rim Light) – Create separation by illuminating the subject’s back, helping to prevent the image from blending into the background.
Maintain a color temperature of 3200–5600K to mimic standard cinema lighting, and adjust the camera’s white balance accordingly.
Camera Settings for Optimal Video Recording
When recording inside a cinema‑style room, set your camera to the highest available resolution and frame rate that your equipment supports. For 4K capture, a 30fps setting provides a balanced trade‑off between smooth motion and file size. Enable dual native ISO if available to reduce noise in low‑light conditions. Use a flat picture profile or a log setting to preserve dynamic range, giving you flexibility during color grading.
Choosing the Right Recording Equipment
While many consumers use smartphone cameras, a dedicated camcorder or DSLR with a high‑quality sensor will deliver superior results. Pair this with a reliable audio recorder, such as a portable multitrack device, to keep audio and video streams separate. Synchronizing the two streams later in post‑production can be accomplished via a clapboard or by embedding a timecode signal.
Post‑Production: Syncing Audio and Video
Use waveform matching or a dedicated audio sync software to align the separate tracks. Once synced, perform a basic edit: trim unwanted sections, adjust levels, and apply color correction. A linear workflow—audio first, then video—helps maintain a clear mental map of the project.
Common Pitfalls and How to Avoid Them
Even seasoned hobbyists can fall into traps that degrade recording quality. Here are three frequent issues and their solutions:
- Room Echo – Mitigate by adding absorptive material or repositioning speakers and microphones.
- Electrical Noise – Use isolated power sources, keep cables away from high‑current lines, and employ ground‑lift adapters if needed.
- Color Banding – Capture at a higher bit depth (e.g., 10‑bit) and avoid over‑saturation during exposure.
Maintenance of Recording Gear
Regularly clean lenses, microphones, and cables. Store equipment in a dry, dust‑free environment. Check battery levels before each session to prevent unexpected power loss. Finally, back up all recordings immediately to a separate storage device to safeguard against data corruption.
Future‑Proofing Your Home Cinema Recording Setup
Technology evolves rapidly. To keep your home cinema at the cutting edge, consider investing in modular components that can be upgraded independently—such as a modular audio interface, a camera with interchangeable lenses, or a smart lighting system. Also, keep firmware and software up‑to‑date, as vendors routinely add features that improve performance and usability.
Community and Continued Learning
Join online forums, local clubs, or workshops dedicated to audio‑visual production. Sharing knowledge and reviewing peers’ work can expose you to new techniques and creative solutions. Never stop experimenting; the best recordings come from a combination of technical mastery and artistic intuition.
Conclusion: Elevating Home Cinema Through Thoughtful Recording
Recording quality within a cinema‑style room is not merely a technical challenge; it’s an artistic endeavor. By attentively managing acoustics, lighting, and signal flow—and by selecting the right gear—you can transform an ordinary living space into a professional studio that delivers breathtaking audio and video experiences. Embrace the process, iterate, and enjoy the rich, immersive world that meticulous recording opens up to your home cinema.