When turning a spare room into a private cinema, the audio and video experience hinges on more than just projector quality and comfortable seating. The heart of a well‑balanced system is the mixing console, a versatile tool that brings together microphones, cameras, playback devices, and playback speakers into a single cohesive workflow. This article explores how a mixing console can transform a home cinema into a professional‑grade studio, covering hardware fundamentals, signal flow, level management, equalization, dynamics, video synchronization, monitoring, and troubleshooting.
Choosing the Right Mixing Console for Your Space
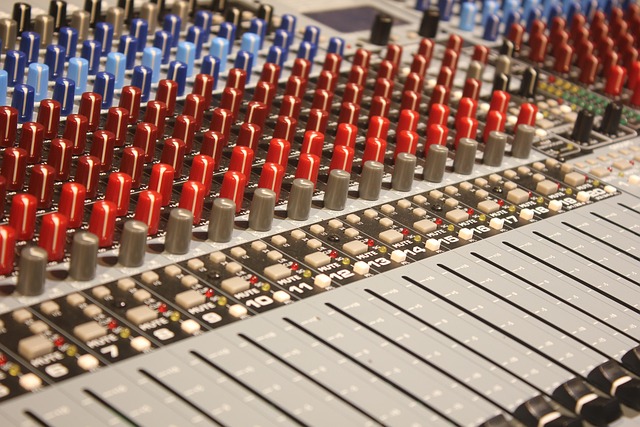
Home cinema enthusiasts often gravitate toward all‑in‑one soundbars or simple AV receivers, but a dedicated mixing console—or mixing board—offers granular control over every channel. When selecting a unit, consider the number of inputs, the type of connectors (XLR, TRS, RCA, HDMI), and whether the board supports both analog and digital paths. Small to medium consoles, such as 8‑channel units, provide a good balance between portability and capability. For larger setups, a 16‑channel board can accommodate multiple microphones, camera audio feeds, and even live instruments.
- Input count: ensure enough channels for all sources.
- Connectivity: look for a mix of balanced XLR, TRS, and digital HDMI or ADAT ports.
- Build quality: metal chassis and high‑quality components reduce noise.
- Software integration: some boards pair with DAWs for remote control.
Understanding Signal Flow on a Mixing Console
Signal flow is the path that audio takes from the source to the output. In a home cinema, the console typically receives audio from microphones, cameras, or playback devices, processes it through pre‑amps, EQ, and dynamics, and then routes the clean mix to a speaker system or a recording interface. Visualizing this flow helps prevent phase issues, crosstalk, and unwanted distortion. A simplified flow diagram might include:
- Source (microphone, camera audio, or playback device)
- Pre‑amp section (boosts weak signals to line level)
- Channel strip (EQ, dynamics, auxiliary sends)
- Master bus (overall level, global EQ, compression)
- Output (speaker system or recording interface)
Keep each stage isolated where possible to maintain signal integrity.
Mastering Gain Staging on a Mixing Console
Good gain staging is the foundation of a clean, noise‑free audio mix. Each channel on the console should be set so that the signal peaks just below the unit’s maximum input level, typically around +4 dB on the console’s meter. This approach leaves headroom for subsequent processing and ensures that the overall mix does not clip when the master fader moves.
- Start with the input gain knob at the lowest setting.
- Gradually increase while speaking or playing the source, watching the VU meter.
- Use the channel’s peak indicator to avoid transients that exceed 0 dB.
- Adjust the master fader after balancing all channels.
Equalization and Dynamics for a Home Cinema Soundscape
A mixing console’s EQ section allows you to sculpt each source to fit the room’s acoustics. A common practice in cinema rooms is to use a high‑pass filter on all microphones to eliminate rumble and low‑frequency room noise. For voice‑over or dialogue tracks, a gentle boost around 3 kHz can enhance intelligibility. Dynamics processing—compression or limiting—ensures consistent level across scenes, preventing sudden jumps in volume that can distract viewers.
“Compression on dialogue channels should be subtle, aiming for a 3:1 ratio and a slow release to preserve natural dynamics.”
Synchronizing Audio and Video Signals
When recording a film or video in a home studio, audio and video must be perfectly synchronized. A mixing console can handle this in several ways:
- Audio Timecode Input: Some consoles accept timecode via an optical or serial port, allowing the audio to lock to the video timeline.
- SMPTE Sync: Using an SMPTE encoder, the console can send a timecode signal to a camera or recorder.
- Audio LFE Return: If your console provides a low‑frequency return, you can feed this signal back to the camera’s audio input for instant sync.
Proper sync prevents the dreaded “lip‑synchronization” glitch that can ruin a film’s quality.
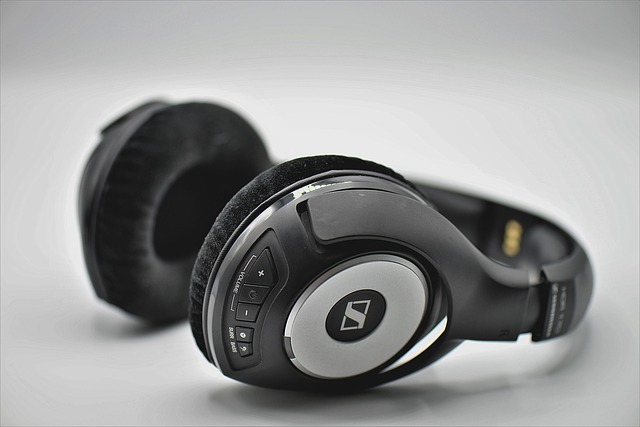
Monitoring Your Mix with Headphones and Speakers
Monitoring is essential for verifying that your mix translates well to the final playback system. A dedicated headphone channel on the mixing console, equipped with a separate gain knob and low‑pass filter, allows you to hear a detailed, uncolored version of the mix. Speakers used for monitoring should be placed at a realistic listening distance, mirroring the cinema seating arrangement. Some consoles offer dual monitoring paths—one for headphones and one for a monitor speaker output—enabling simultaneous checks.
Multi‑Track Recording from a Mixing Console
Recording each channel separately gives you flexibility during post‑production. Connect the console’s “stereo pair” or “multitrack” outputs to an audio interface or recorder. If the console supports ADAT or S/PDIF, you can transmit eight or more tracks digitally. When routing, ensure that each track is labelled accurately to avoid confusion during editing.
- Use the console’s “matrix” output for stereo mixes.
- Record individual tracks for dialogue, music, and effects.
- Tag each track with scene or take information.
Common Troubleshooting Scenarios
Even a well‑built mixing console can exhibit issues in a home cinema setting. Below are frequent problems and practical fixes:
- Low Output Levels: Verify input gain, channel fader positions, and master bus level.
- Noise or Hum: Check for balanced XLR connections and ensure all cables are secure. Ground loops often appear when multiple devices share the same outlet.
- Clipping: Reduce the gain on the offending channel and lower the master fader until the peak indicator stays below 0 dB.
- Synchronization Loss: Re‑calibrate timecode settings and confirm that the camera and console clocks are aligned.
Automation and Presets for Reproducibility
Once you have a clean mix, you can save the console’s channel settings, EQ, dynamics, and routing as a preset. Most modern boards allow you to recall these presets quickly, which is invaluable when switching between different movie projects or live recording sessions. Automation, such as fader curves and mute/solo toggles, can be recorded within the console or exported to a digital audio workstation for fine‑tuning.
Final Practical Tips for Home Cinema Audio Mastery
Achieving professional‑grade audio in a home cinema isn’t about spending thousands on gear; it’s about disciplined setup and thoughtful use of a mixing console. Here are a few closing reminders:
- Always perform a baseline test recording to confirm levels and sync.
- Maintain a tidy cable management system to avoid accidental disconnections.
- Document your routing map, especially if you reuse the same console for multiple projects.
- Schedule periodic maintenance: clean connectors and update firmware if applicable.
- Keep a set of reference tracks to compare your mix against.