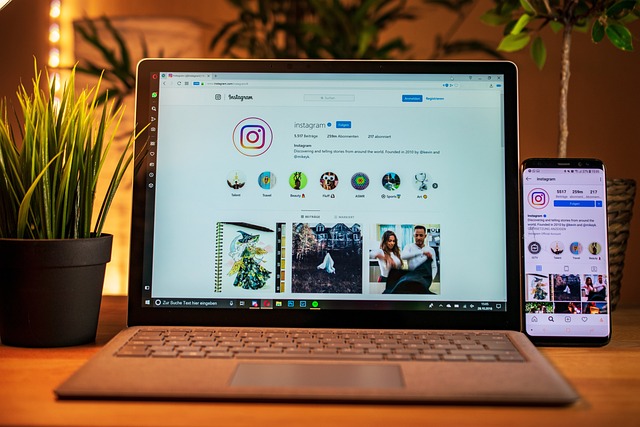
When you think of Instagram, the first thing that comes to mind is a stream of colorful photos, quick reels, and the latest filters. Yet, behind many of those glossy moments is a carefully curated audio‑video setup that transforms a living space into a cinema‑grade experience. Whether you’re filming short clips for your feed or recording a full‑length feature to share with friends, the same principles that create a home cinema can elevate the quality of your Instagram content. This article walks you through the essentials of setting up a sound‑and‑video system that turns any room into a personal theater while keeping your posts crisp, cinematic, and shareable.
Why a Dedicated Home Cinema Space Matters for Instagram Creators
Many creators make their videos in cramped spaces: a bedroom with a cluttered desk or a corner of the living room. In those settings, the lighting can be harsh, the acoustics uneven, and the background distracting. A dedicated cinema room—designed for optimal audio and visual performance—addresses all these issues in one place.
- Controlled Lighting – Allows you to use professional-grade LED panels or ring lights without glare.
- Acoustic Treatment – Absorptive panels and bass traps reduce echo and muddiness, ensuring your voice and music come through clearly.
- Background Management – A black velvet curtain or a sound‑dead wall gives you a neutral backdrop that keeps the focus on the subject.
By filming in a space engineered for cinema, you eliminate many of the variables that can degrade a video’s audio and visual quality, making your Instagram posts instantly more engaging.
Step 1: Plan Your Room Layout
The first order of business is to map out the room. Treat it like you would a traditional theater: a clear sight line from the audience (your viewers) to the stage (your camera).
“Position the camera at a comfortable eye level and leave a buffer zone of at least three feet behind the lens to avoid unwanted reflections.”
Here are key points to consider:
- Place the camera on a sturdy tripod, centered between the front wall and the background.
- Arrange seating or a couch to sit 10–12 feet away, matching typical Instagram video distances.
- Use a backdrop that can be pulled away when you need more space for a large prop.
Step 2: Upgrade Your Audio
Sound quality is often the first thing viewers notice. A weak mic can ruin even the best footage. For Instagram videos, the following audio components are essential:
- Shotgun Microphone – Focused on the speaker, reducing ambient noise.
- USB Lavalier Mic – Ideal for on‑the‑go creators who need a discreet option.
- Portable Audio Interface – Connects XLR mics to your laptop or DSLR for professional levels.
Don’t forget acoustic panels. Placing foam or fabric panels on the walls can lower the room’s reverberation time to 0.4–0.6 seconds, a sweet spot for spoken word content.
Choosing the Right Microphone for Your Content
Here’s a quick guide based on typical Instagram video styles:
- Vlogging – Lavalier mic on a neck strap to keep the camera free for movement.
- Tutorials – Shotgun mic angled at 45 degrees toward the presenter.
- Music Performances – Condenser mic with a pop filter for crisp vocal capture.
Step 3: Optimize Your Video Capture
Once audio is sorted, focus shifts to video. Instagram favors high‑resolution, well‑lit content. The following tools and settings ensure your footage looks professional.
- Camera – A DSLR or mirrorless camera capable of 4K recording is ideal. For those using smartphones, choose the highest resolution mode available.
- Lens Choice – A 24‑70mm zoom lens offers versatility from wide shots to tight headshots. If you’re shooting a single subject, a prime 35mm provides flattering angles.
- Lighting Setup – Three‑point lighting (key, fill, back) creates depth. Use LED panels with adjustable color temperature (2700K–6500K).
- White Balance – Manually set to match your lighting; auto white balance can shift during a shot, ruining color consistency.
Lighting Tips for the Instagram Aesthetic
Instagram thrives on vibrant, eye‑catching visuals. Here’s how to achieve that look:
- Key Light – Positioned at a 45‑degree angle to the subject, this provides the main illumination.
- Fill Light – Softens shadows, placed opposite the key light at a lower intensity.
- Back Light – Adds separation from the background, giving a subtle halo effect.
- Use a diffuser on the key light to reduce harshness, especially for close‑up shots.
Step 4: Capture and Edit with the Instagram Workflow in Mind
Once you’ve recorded, the editing process should keep Instagram’s format and audience in focus. The platform favors vertical videos (9:16) and quick, dynamic cuts.
- Aspect Ratio – Export in 1080×1920 or 720×1280 for best compatibility.
- Color Grading – Apply a subtle cinematic LUT to enhance contrast while maintaining natural skin tones.
- Audio Leveling – Aim for 0 dB peak, with a safety margin of –3 dB to avoid clipping.
- Transitions – Fast cuts, jump cuts, or whip pans keep viewers engaged.
Using Instagram Reels Features for Final Polish
After you export from your editing software, upload to Instagram’s Reels or IGTV. Leverage built‑in tools for a final polish:
- Use the Trim function to cut unnecessary parts without re‑uploading.
- Add Text Overlays with concise captions—Instagram’s audience scrolls fast.
- Incorporate Sound Effects or background music from Instagram’s library to boost engagement.
- Apply a Filter that matches the mood of your content, but avoid overly dramatic effects that distort audio.
Maintaining Your Cinema‑Grade Setup Over Time
Equipment can degrade, and room acoustics can shift. Regular checks keep your system in peak condition.
- Test audio levels weekly using a sound level meter.
- Clean lenses and filters with microfiber cloths; avoid chemical cleaners that can damage coatings.
- Inspect acoustic panels for sagging or dust buildup, and replace or reposition as needed.
- Re‑evaluate lighting positions if you add new props or change camera angles.
Building a Content Calendar That Reflects Your Studio
A consistent filming schedule not only keeps your audience engaged but also lets you refine your setup. Try this approach:
- Identify 3–5 core content themes (e.g., tutorials, reviews, behind‑the‑scenes).
- Assign each theme to a specific day of the week to create a predictable rhythm.
- Use the studio’s acoustics to experiment with different audio styles—dry versus reverberant, mono versus surround mix—depending on the theme.
- Record a short “setup walk‑through” video each month to show followers the behind‑the‑scenes effort behind high‑quality posts.
Conclusion: Elevate Every Post With Professional Audio‑Video Quality
Instagram is a platform where first impressions matter. By investing in a home cinema audio‑video setup, you transform each post into a polished, immersive experience. The key is to treat your studio like a miniature theater: control the light, master the sound, and curate the visual flow. With these tools and techniques, you’ll not only improve your content’s technical quality but also build a distinct brand identity that resonates with your followers.